Saturday, 25 May 2013

Workflow Log Analysis in SAP

Analyzing a workflow log place a very important role especially when you are in support project. Workflow log analysis helps us to find the root cause and to track the crux of any issues encountered in the workflow cycle.

In this blog we will see how to proceed when the Invoice (MIR4) related issue is faced wherein we have to track who is the agent responsible? When the agent responsible approved the invoice? Different rules to identify the Actual agent? Which IDoc is triggered? What kind of notification is set? And so on…

1. Run the T-Code MIR4 (Display Invoice Document). Input the invoice number for which you want to do the analysis and click on display document.
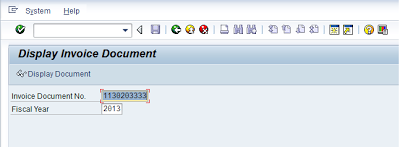

2. In the displayed invoice click on the GOS (Generic Object Services) object à Workflow à Workflow Overview.


3. As soon as you click on Workflow overview a popup will appear displaying the details of the Invoice workflow. Now click on display workflow log.


4. Now you will see workflow log screen. Suppose if you want to know who exactly are Actual / Possible / excluded  Agents, just click on any of the Agents button it will show you the respective agents.  One pint to remember here is that Actual Agents are mostly determined by using Rules, Positions and Expressions. An Actual agent must be one among the possible agents minus the excluded agents. You can find to which notification does the agent belongs in ‘PPOSE’ Tcode and in ‘SU01D’ Tcode you can find the agents details. Some times situation will arise where you have to debug the Rule used to determine the actual agent in order to find the actual agent.


5. If you want to know the technical details of the invoice workflow, click on table content button.


6. Now you will see Workflow Id which is nothing but task id which begins with WS followed by 8 digit number and different work items associated with workflow. In this the Container tab is just like a repository which stores the information regarding the various elements involved in Workflow.  You can find who has started the workflow, which business object is used, which IDoc is created and all the container elements. See to it that binding exists in all the container elements.


7. If you want to see the design of the workflow and insight settings of the workflow double click on the Task id WS90000117 or else execute the Tcode ‘SWDD’ and give the Task id you will see the workflow definition.


8. Now double click on any workflow step to know which business object is being used for the task, events that trigger that task and the rules defined to find the agents. In the default rules sub screen you can find the rules used. For invoice related workflows standard business object ‘BUS2081’ is used commonly.


9. Suppose if you want to execute the a particular work item of a workflow then run the ‘SWIA’ Tcode and provide the work item id and execute.


10. After executing, you will see the below screen which shows the work item status and work item type. Now you can do the administrative activities such as Replacing / Completing / Cancelling and so on for more on Cancelling work item refer my blog on Difference between logical and physical deletion of work items in SAP workflow


Talking about work item types and work item statuses,

There are basically 12 types of work items and you can see only 3 types of work items Dialog work item (W), Deadline work item (D) and Work item queue (A).
There are 11 types of work item statuses. The status SELECTED tells that the particular work item is reserved by the agent so that no other possible agents can execute that work item (Once the agent reserves the work item, that particular work item disappears from others’ agents Inbox).

The above steps are just the road map for analyzing workflow log. The concluding analysis depends on you how well you crack it and the kind of problem you encounter in the workflow.

Saturday, 20 April 2013

Table Entry in SAP


We are all aware of the conventional way of inserting, deleting and modifying the table entries in SAP. The process followed to insert, delete or modify the table records in production system is quite different from the way we do it in KPI or development environment. In this blog we will see insertion, deletion, or modification of single or multiple table entries in the production systems.

Single Table Entry:

1.      Execute the T-code: SE11 / SE12 / SE16.

2.      Enter the table name in which you want to do modification and then display the contents of the table.

3.     Double click on entry to which you want to do the modification. Now you will see the below screen. Type ‘/h’ in the command field and press enter twice. When you press enter first time you will see ‘Debugger switched on’ message in the status bar and when you press enter second time you will enter into the debug mode.
4.     In the debugger double click on the variable ‘code’. By default it will have ‘SHOW’ value. If you want to edit the existing table value then change the variable ‘code’  value to ‘EDIT’ (Note: Case Sensitive) by clicking the pencil button. Then keep on pressing F5 (Line by line Execution) until the debugger enter the EDIT section and points to the line: set titilebar ‘TAB’ with name ‘andern’(101). Now press F8.
5.     Now you will see the below screen where you can make the changes to the table entry. After making the changes click on save. You will see a message confirming the changes to the database table. Then click on back. The records are updated.
Follow the same procedure to insert or delete the table entries. You just have to change the variable code value respectively.

Multiple Table Entry:
We will encounter the scenarios where we have to edit, insert or delete multiple table entries at one instance. At that point following the above single table entry procedure is a lengthy process and time consuming. Follow the below steps for editing, inserting or deleting the multiple records from the table at a single time.
1.      Execute the T-code: SE16N
2.      Enter the table name in which you want to do modification and then display the contents of the table.
3.      Import the multiple entries by clicking on arrow button against the field.
4.      Type ‘/h’ in the command field and press enter twice. When you press enter first time you will see ‘Debugger switched on’ message in the status bar and when you press enter second time you will enter into the debug mode.
5.      In the debugger write two fields in the capital letters (Case Sensitive) GD-SAPEDIT and GD-EDIT and change their values to ‘X’ by clicking the pencil button.
6.      Now press F8 you will see the below screen.
7.     Again press F8. It will display the below screen where you can edit, add or remove the multiple entries from the table. Save the values and click on back. Records are updated to the database table.


Tuesday, 19 March 2013

Difference between logical and physical deletion of work items in SAP workflow

For understanding in a simple way, the main difference between logical and physical deletion is as same as the difference between the DELETE and SHIFT+DELETE functionality respectively in windows environment.
Logical deletion: When you perform the logical deletion, work items will be removed from the agent's inbox but will not be deleted permanently from the system.
The main advantage of logical deletion is that we can trace back the agent (Responsible/Possible) to whom work item belongs to/who has performed the deletion and we can retrieve the deleted work item.
After deleting the work item logically its status will be set to CANCELLED.
I have found out three possible ways of deleting the work item logically.
First way, execute the T-code SWIA input the work item id that you want to delete


After that just select the work item go to EDIT menu à Work Item à Logically Delete. Once you are done with this you will see that the status of the work item is changed from STARTED to CANCELLED.


Second one, execute the T-code SWIA give the work item id that you want to delete


                                                                                                                                                                                        Now you will see the work item and its status as STARTED


Select the Work item and enter the Command “ADMC”. As soon as you execute the ADMC Command the status of the work item will change from STARTED to CANCELLED.

We can use ADMC (Administrative Cancel) to delete the multiple work items at a time. For that you just have to select the multiple work items and fallow the same procedure as explained above.
                                                                                                                                                                                                                                                                                                                                                                                                                 
Third way is to execute the SWIA T-code by giving the work item id.


Now double click on the work item


After that click on Menu Goto à Technical work item display


You will see the below screen goto menu EDITà Change 


After that just execute the logical deletion step.


Physical deletion: When you perform the physical deletion, work items will be removed from the agent's inbox but also it will delete the work items permanently from the system.  There by we will not be able to retrieve back the work item.
Caution Note: Don’t you ever try to perform physical deletion in the production environment!!!
After performing the physically deletion of the work item its status will be set to COMPLETED.
There are multiple reports by which we can do the physical deletion which include
·         RSWWWIDE (deletes the work items including attachments)
·         RSWWWIDE_TOPLEVEL (deletes all the dependent work items)
·         RSWWHIDE (deletes the work item history)

Execute the T-code SWWL, Give the work item id that you want delete permanently and mark the check box Delete immediately.


Next you will be asked whether you want to delete permanently or not press YES.


Finally the work item will be physically deleted.


Wednesday, 27 February 2013

Introduction to Idocs in SAP

First let me emphasize on the fact that I am in a budding state when it comes to the field of Idocs (Intermediate Documents). I am just doing my level best to put across whatever info I gathered pertaining to Idocs.
Understanding the concept of Idocs is relatively easy when compared to explaining it or rather finding the root cause when an issue is encountered in Idocs.
The first question that arises in our mind is what exactly the Idocs are? Let me put this way, in any business transaction there are basically two entities involved. And the transactions are made in the format which both entities have agreed upon. Idocs are the file formats used to exchange the data between the two entities involved.
Idocs can be Master Idoc or Communication Idocs. The main difference between the two is the number of Idocs generated. There can be only one Master Idoc generated for any number of receivers for the same data but when it comes to Communication Idoc number depends on number of receivers for the same data.
Idocs are mainly categorized into two types.
1.       Outbound Idoc (Sender)
2.       Inbound Idoc (Receiver)
 
For example triggering an Idoc whenever a sales order (VA01) is created is Outbound Idoc and creating a sales order using the same triggered Idoc is Inbound Idoc.
VA01 à Idoc (Outbound)
Idoc à VA01 (Inbound)

Structure of an Idoc
Idoc mainly consist of three types of records as shown in the below screenshot.
1.       Control Record
2.       Data Record
3.       Status Record

An Idoc can have multiple data and status records but there can be only one control record.


Control Record: Control records ate stored in EDIDC table which contains the key info which is essential to establish the connection between the two systems (done through RFC Configuration – SM59). 

                                                                                                                                                             Data Record: The structure EDIDD holds all the data transferred through Idoc in the form of segments. It specifies the Idoc Number, Segment Type and so on. 


Status Record: When an Idoc is processed, at each level a status record is generated which will specify the current status of an Idoc. For Outbound process the status records range is 01-49 and for Inbound process 50-75. The table EDIDS stores all the status records.
 
                                                                                                                                                                            For successful Outbound process the status of an Idoc should be 03 and for Inbound process 53 should be the status. We can see all the status messages via WE47 Tcode.


There is one more data record EDID4 (Idoc Data Records) which will store all the inbound and the outbound Idocs and their corresponding segments.


References: